

Have you seen the larger than the mat Cricut characters made out of cardstock and wondered how they are made? Let's look at some basic steps to create these large characters and check out some tips and tricks for off the mat Cricut projects.
*This blog post may contain affiliate links that help me earn a small commission at no charge to you. Please read my full disclosure here*
Mobile users turn your phone or watch the YouTube video here.
Understanding "Off the Mat" Projects

So, what does "off the mat" mean - a Cricut mat comes in 2 sizes if you have a Cricut Maker or Explore. Those sizes are 12 x 12 inches and 12 x 24 inches. the max cut size on the smaller is 11.5x11.5 inches and the larger is 11.5 x 23.5. Now materials of course will also limit your sizing for projects (thinking mostly in cardstock paper here). Michaels Stores does carry larger paper but in limited colors so our choices are usually 12x12 inches. So, looping back to an "off the mat" character means that the character is larger than that max size of the mat. Recently, I made a 22 in by 18 inch Spider-man for my son's 5th birthday and I wanted to share some of the tips I used to make this character.

Don't forget you can also utilize vinyl and heat transfer vinyl to your cardstock projects to add patterms, textures, and things like glow in the dark pieces. You can add more than just cardstock paper to your off the mats!
Scaling and Slicing Techniques
So, the way I work out my SVG's for these are pretty easy and when you start try not to worry about seams or lines down the middle. Making an off the mat large project can be overwhelming so worrying about small things to start is just going to make you more worried! Focus on getting the idea down first.
Note: I made my SVG files over in inkscape but then break them up in Cricut Design Space because sometimes scaling in inkscape does not transfer over properly. It's easier to get your sizing correct over in DS rather than try to pre-slice everything in inkscape. If you want to learn how to easily create your own SVG file (like my Spider-man) then make sure to watch the YouTube tutorial above!
I start by sizing and ungrouping my color layers. Anything that is under my 11.5 inch max I feel is ready to cut. Everything else I work with two techniques.
The Contour Technique
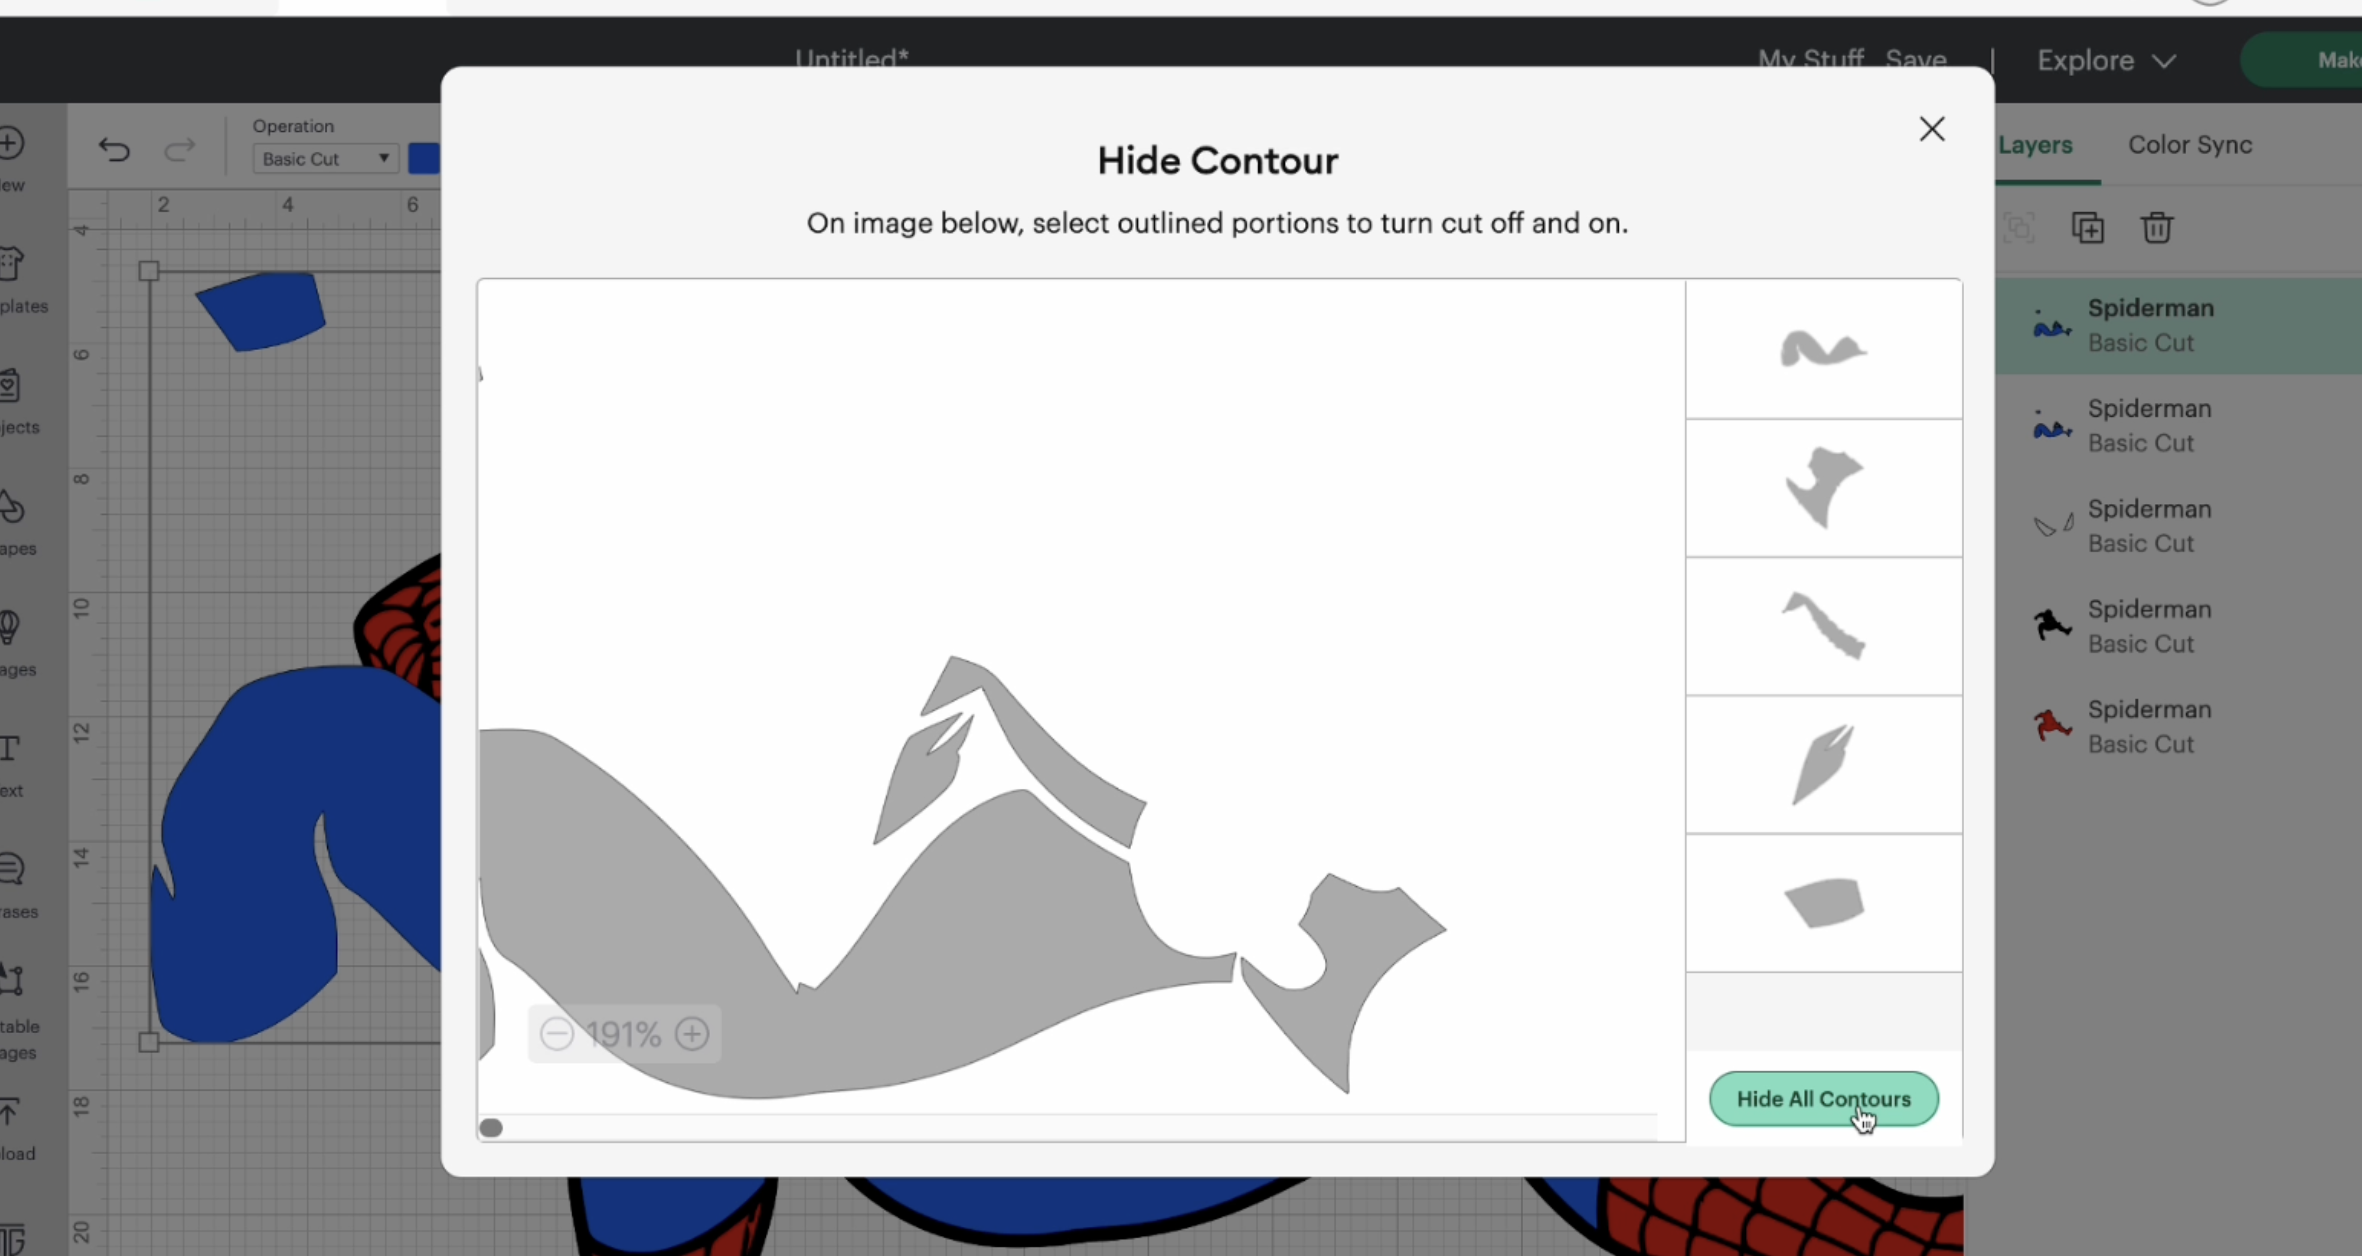
This I use for "smaller" pieces for example the blue layer on Spider-man. I duplicate the layer and contour pieces so that they become smaller than 11.5 inches. These is also great for fitting more pieces onto a 12 x 12 piece of paper.
You duplicate and contour (which hides pieces) so that you have smaller parts to cut out.
The Slicing Technique

This is the most common way to go about it, I pull a 11.5x11.5 inch square from the free shapes. I duplicate and arrge them over the large piece (for example the large backing).

Then I arrange it onto the bigger pieces making sure to cover the whole thing with little to no overlap (again I am not worrying about seams) and start slicing. I delete the extra pieces, keeping only the original color and this will break up the large image into pieces that will fit on the mat. It's like you are creating a puzzle to put back together.
Once you have all your pieces sliced you can send to your mats to cut. I always double check to see if I can move any pieces to save paper.
Tips:
- For the back, try to slice under larger pieces, like Spider-man's pants or arms. You can cover up some seams.
- I change the color of my squares when slicing so that I can see them pop, I also like to push them to the back to see the character image over them to see where my slices will be.
Assembling Your Larger than the Mat Project

- Start with your base and remember to flip over and attach on the back. I am not very fancy and used painters tape on some of my older projects and on Spider-man I used good old fashioned scotch tape.
- Some people like to use thick poster board and trace the backing to give it a thicker base. I don't do this but I also haven't really had the need yet. It is definitely a great suggestion if you are planning on standing them up in any way.
- Once your base is created, start your puzzle! I keep my image up on Cricut Design Space so I can reference back to it and place everything on properly.
- I like to use my Bearly Arts glue for my projects because it dries clear and quick!


Tip for Spider-man: I poked a hole in his hand and attached some yarn to look like he was shooting a web.

If you're looking for more tips and tricks don't forget to check out my original tutorial here:


.webp)