


Crafting Convenience: DIY Magnetic Bookmarks with Cricut's Print and Cut Method
Prepare to tap into your creative spirit as I guide you through a step-by-step craft tutorial, helping you craft your very own DIY magnetic bookmarks. Using the Print and Cut method with your Cricut machine, I'll show you how to infuse a personal touch into your reading experience. If you're someone who, like me, cherishes books and enjoys adding a unique flair to everyday items, this tutorial is tailor-made for our imaginative souls. Join me on a crafting journey where I'll carefully lead you through each simple yet highly satisfying step, empowering you to create both functional and delightful magnetic bookmarks.
*This blog posts contains affiliate links that may help earn me a small commission at no extra charge to you, read my full disclosure here.*
Mobile users turn your phone or watch the YouTube video here.
Materials and Tools
- Cricut Machine or any other cutting machine
- Printer if you are using the Print and Cut method
- Magnets or magnetic sheets - I am using these from Amazon
- Scissors to cut the magnet sheets
- Optional: Vinyl - I used this for the text so it had a foil look
- Optional: scoring stylus
Cricut Design Space Set Up
To start I want to let you know, I downloaded the floral image from Creative Fabrica - who I prefer so much over Cricut Access but thats a story for another day. You can grab a free trial to Creative Fabrica here. If you want to just grab the watercolor floral design I used, you can get that here.

You can truly design this however you want so I am going to focus on some main steps here. to start, I am making just one side and I want the shapes to match up so that when folded they align perfectly.
I started by writing out some text, welding and creating and offset.

Next, I changed the offset to white because I am going to be flatting all of this and don't want any color to print. I wanted the offset to create a cut out look into the flower.
I grabbed a rounded square from the shapes section of Cricut Design Space and sent it back, you can pick any shape for this but keep in mind when you rotate how it will fit together when folded over.

I changed this color to white as well since I am doing a print and cut and don't want any color to print out. Once you have everything placed where you want, you can flatten. I flattened the backing, the floral print, and the offset. I left the text to be cut out in foil vinyl.
Next, you want to create the other side. Duplicate everything, rotate 180 degrees, then create a bar with a rectangle in between. Make sure to align and center.

Change to the middle bar to white if thats what you're printing and flatten everything again. Keep in mind your sizing so it fits in your print and cut area.
Optional: You can add a score line and center it to the middle of the bookmark for easy folding, maker sure to attach.

Now we are ready to cut, I used the medium cardstock setting and premium vinyl but this will depend on what you make!
DIY Magnet Bookmark Assembly
I started with weeding my vinyl and adhering it to the bookmarks. Be very gentle when using transfer tape on paper.

I didn't have my Cricut cut my magnet sheets, instead I just used good old fashion scissors. I like the magnet sheets because they are pretty thin.

I cut a strip and then folded it in half and kept these together. I peeled off one side and adhered it to one of the sides of the bookmark.

While still magnetized together, peel the other adhesive and stick down the other side.
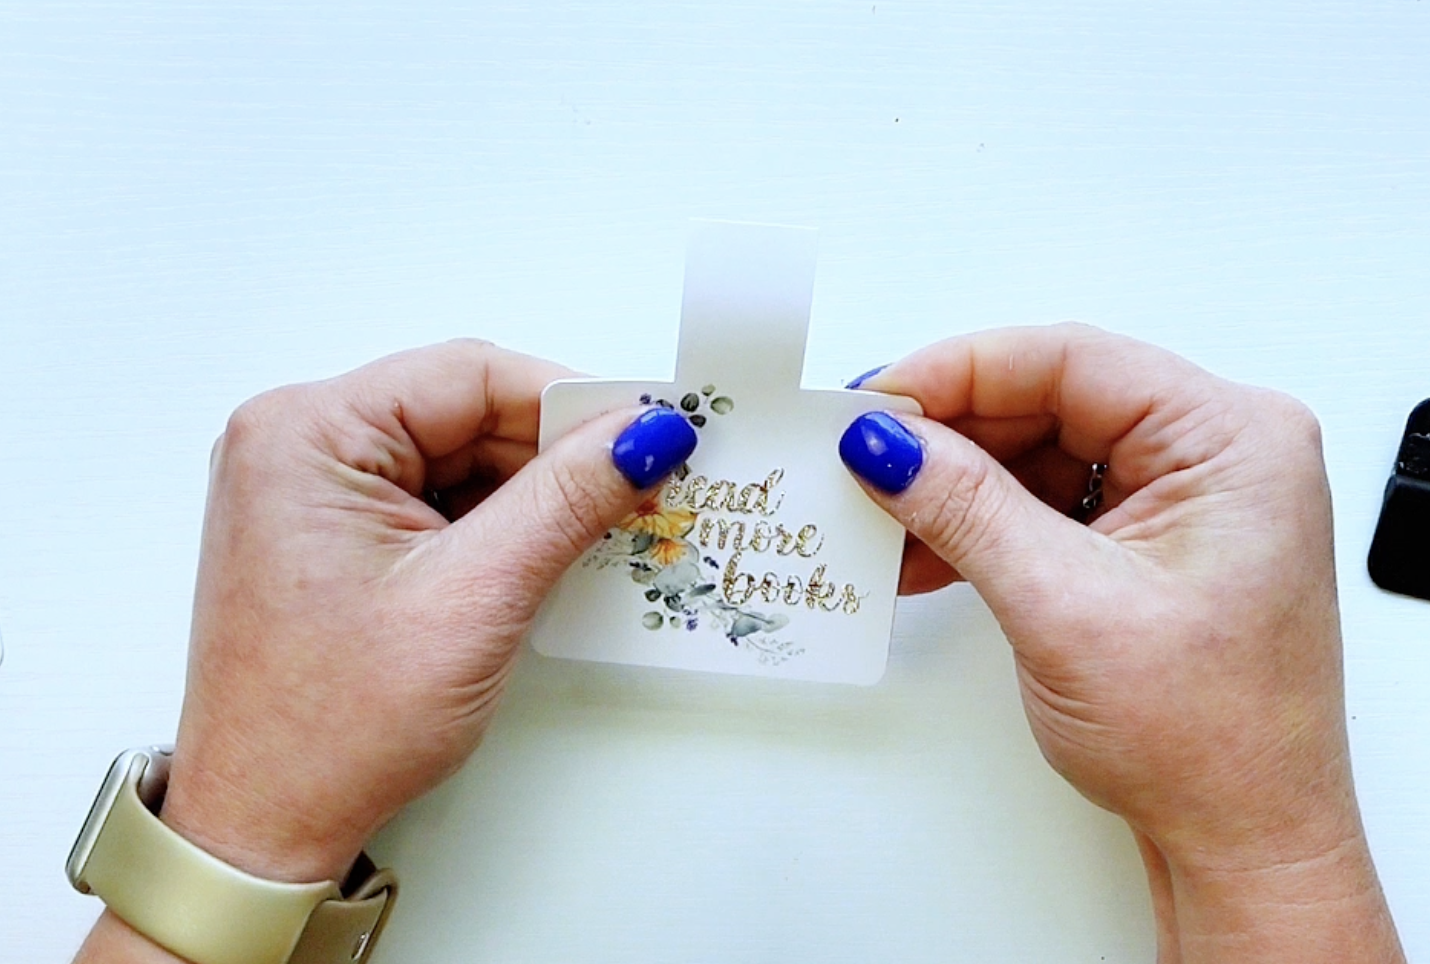
Now you've created the magnetic bookmarks!

And there you have it – your very own magnetic bookmarks, a blend of creativity and practicality that'll make your reading escapades even more enchanting! With a sprinkle of Cricut magic and a dash of DIY spirit, you've crafted bookmarks that don't just mark pages, but also mark moments of pure imaginative joy. So go on, let your books and your newfound craftiness unite in a symphony of smiles. Happy reading and stay crafty!


.webp)