


Let's Create a DIY Video Game Controller Box with a Step-by-Step Cricut Tutorial and Free SVG File!
*Affiliate links may be spread throughout this blog post - these help me earn a small comission at no extra charge to you! Read my full disclosure here.
This video game controller box is a fun DIY Cricut project for Father's Day, a Birthday gift, or even as a little display piece by your console. In this step-by-step tutorial we will go through the Cricut Design Space set up, gather our materials and tools, and assemble this free SVG File. Let's get crafty with card stock!
Mobile users turn your phone or watch the YouTube video here.
Materials and Tools Needed
This project actually only requires two things: card stock paper - I used 80 lb paper in black and shiny gray plus red, blue, green, and yellow for the button colors. You can shop here and save with code KELSS53! You will also need craft glue - I am using Bearly Arts (you can save with code DINOMAMA) but you can also opt for hot glue if you prefer. As for tools my biggest suggestion is going to be a pair of good craft tweezers - I love my Hobby Captain set from Amazon. You will also need a Cricut machine or Silhouette to cut out the free SVG file.
If you prefer to use HTV on your cardstock for the letters that is always a great option!
Download the Free SVG File for Your Cricut or Silhouette
This file can be found under my community SVG Files - you will need to sign up for my newsletter below to receive the password. Please keep in mind it may take a few minutes to receive the welcome letter - please check spam or junk for it as well! The instructions for download can be found here for desktop and here for iPad/iPhone. Note: the preview of the SVG may not show the full file - to see the full file please upload to your design space software to see it and the layers.
The file will be towards the bottom of the community SVG files - so please scroll down to find it!
Cricut Design Space Set Up
This file include the perforation lines - which I hope you are loving! - so the set up is as easy as upload, change colors, and cut. However, you can make one addition. The box when uploaded will be around 6 inches wide.

I did not add the button letters (ABXY) because I didn't want to limit you, you can make this custom with a name or HBD (Happy Birthday Day), change the font. Make it yours!
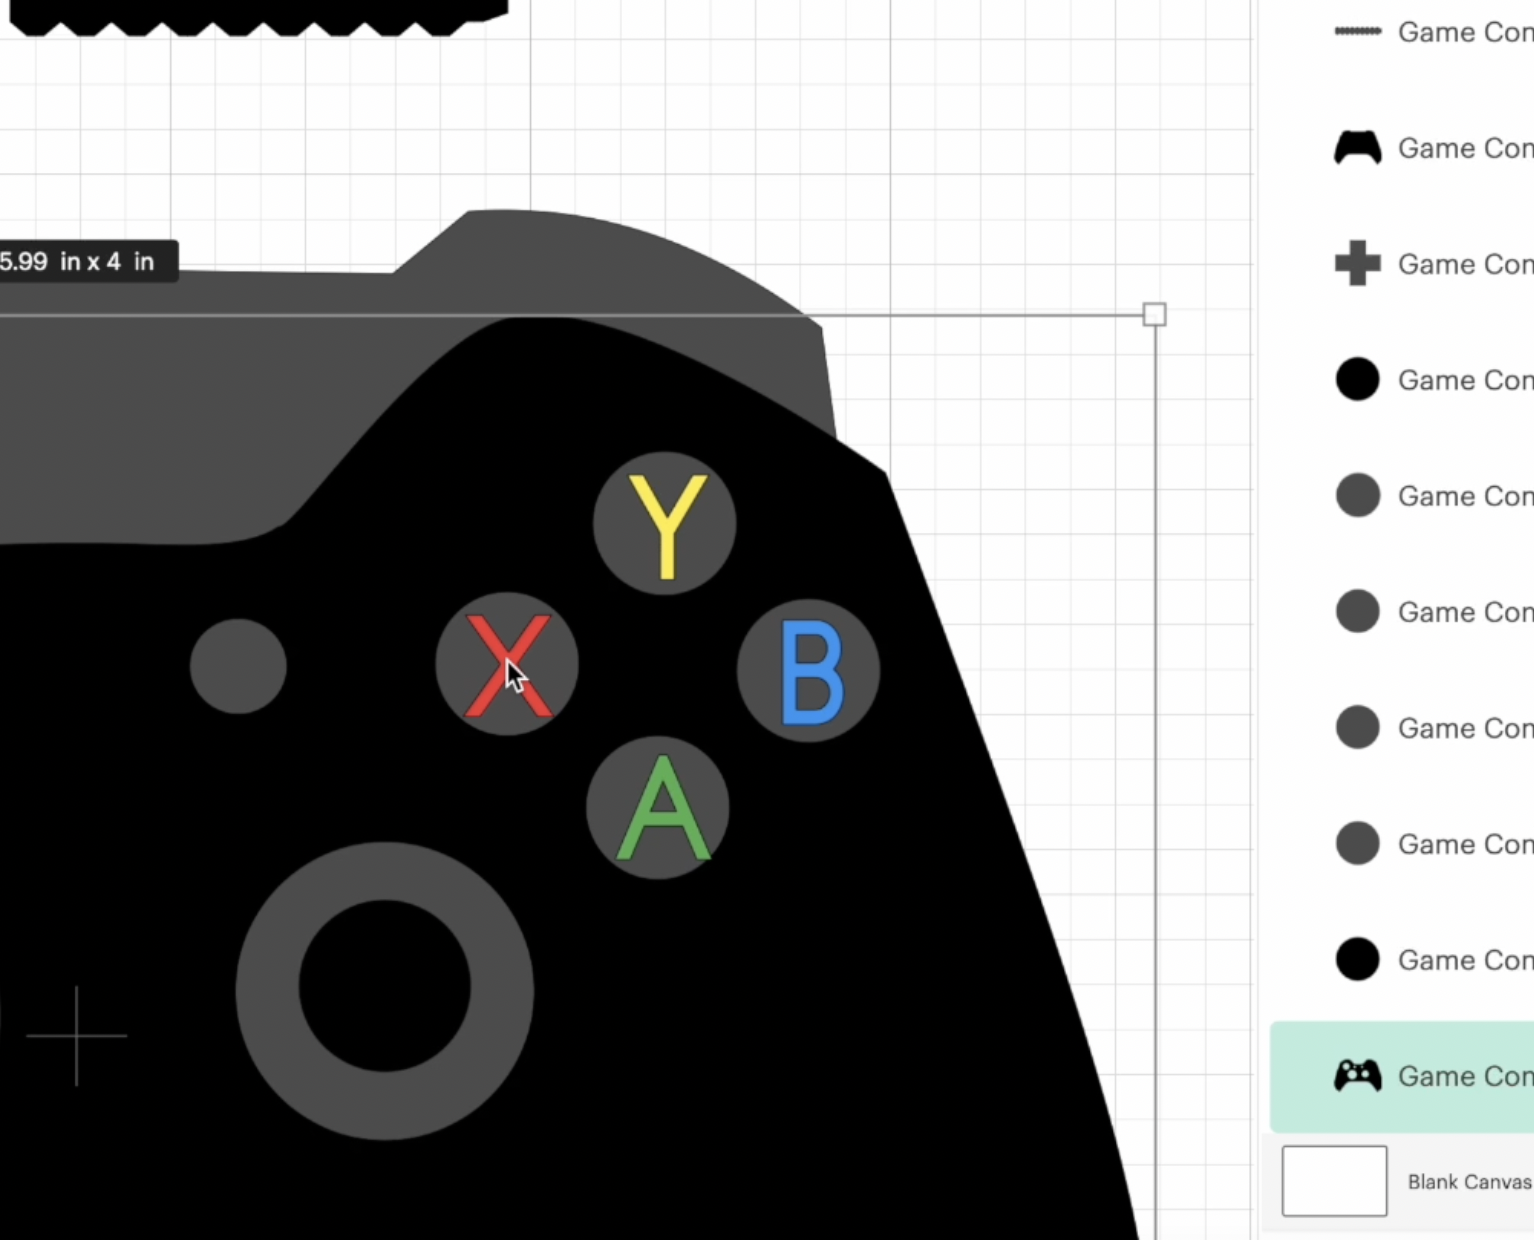
I cut everything out using the medium cardstock setting - please keep in mind my settings might be different depending on your blades and machine.
Assembling the DIY Controller Box
I started by putting my letters onto the smaller circles for the buttons. I used cardstock to cut these out so I used a little bit of glue but HTV or vinyl are great options as well! Keep in mind the sides your using if you are using textured or shimmer cardstock paper.

Next I added the 3D side, for this I folded in on the side tabs and then connected it on the end so it stayed round. I held this together with tweezers. Once it was set, I glued the button with the letter onto the top. You will repeat this with all the round buttons. Make sure to keep the pieces together - the round buttons come in two sizes.
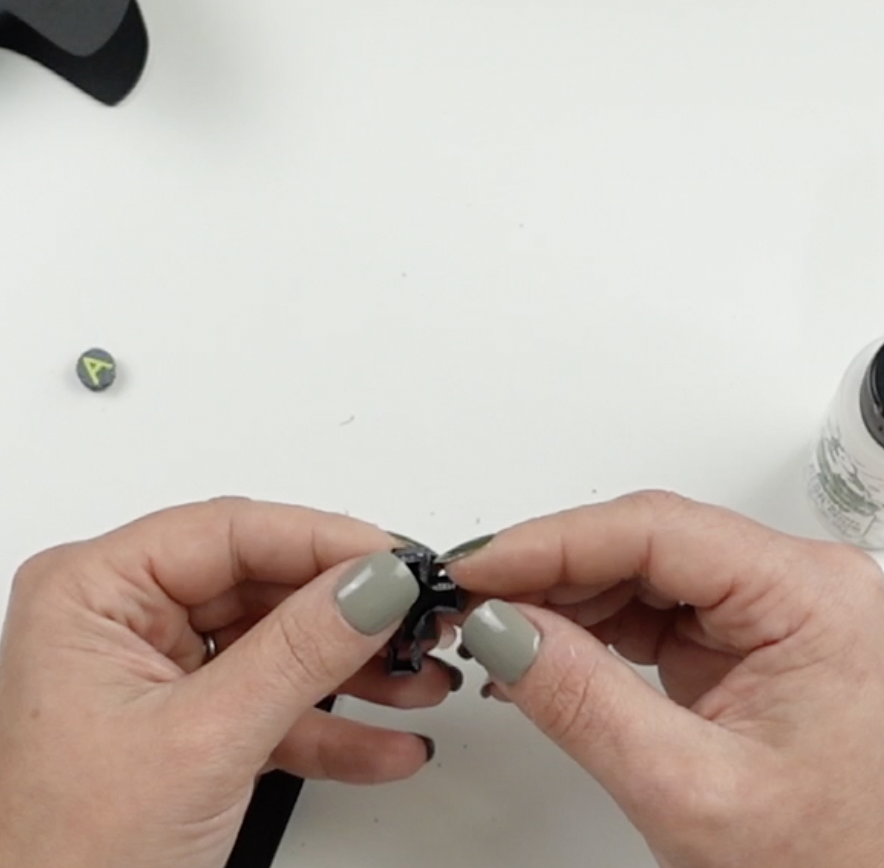
Next, I worked on the paper plus sign (which I just found out is called the directional pad or D-Pad). This is similar to the round pieces. I folded in on the side tabs and then glued the ends together. Then I worked my way around the PLUS piece patiently. Take your time on this so that you line everything up and it dries correctly.

After you have your detail paper pieces assembled, we can move onto the boxes. The top piece is going to be shorter and bigger, the bottom will be taller but smaller. Remember to keep these in the proper groups for proper assembly. I made the top and bottom different colors so that I did not mix them up.

Using the same technique, you will go around and fold in the tabs. Attach the two pieces together and then glue it to the face of the controller. This is the same for the top and the bottom.

Now we can attach the detail pieces to the top of the box. I used an ample amount of glue to place these pieces down so that the 3D parts did not pop off. Be patient again as you wait for glue to dry and adhere.

Once the glue has dried, your DIY video game controller box is almost complete! You can further personalize it by adding decals, stickers, or any other decorative elements you desire. Let your imagination run wild and make it uniquely yours.
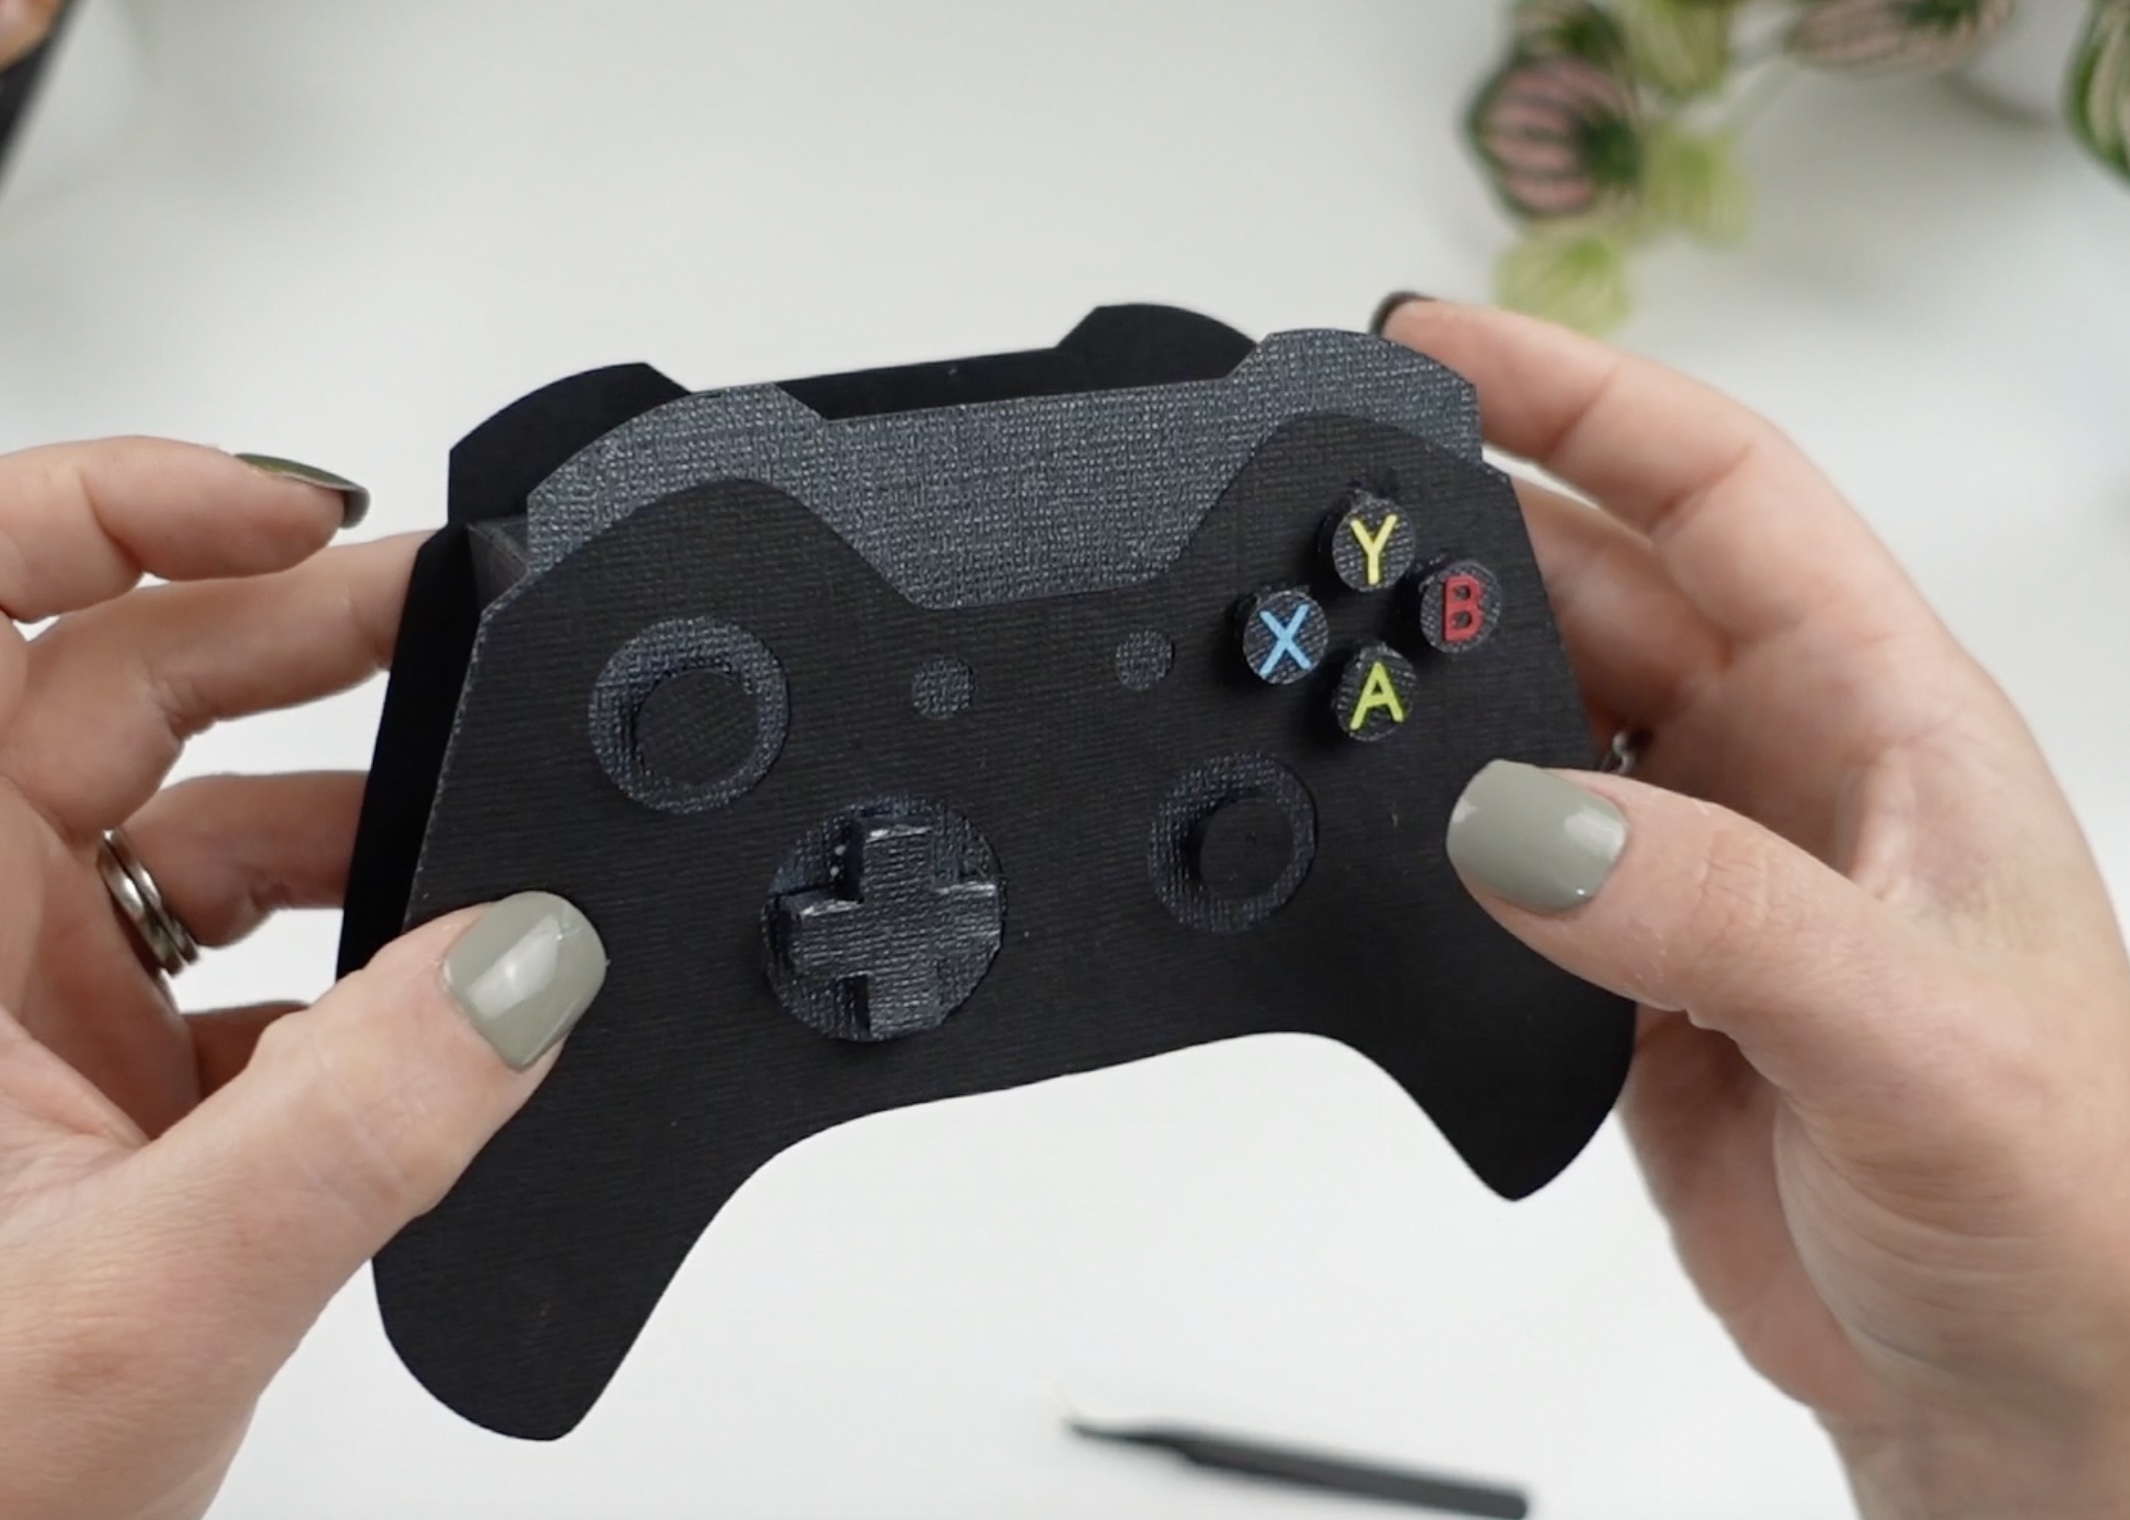
Congratulations on making a DIY Video Game Controller Box!
Stay Crafty!
Don't forget to sign up to my newsletter for more Cricut craft projects, free SVG files, and giveaways!


.webp)
